Does anyone know where to find the pins/terminals for the Fiero instrument cluster connectors?
CarQuest doesn't carry them, and without the part number they are turning out to be very difficult to find...
The Mule rides again (sort of) - pics.
Moderators: The Dark Side of Will, Series8217
-
The Dark Side of Will
- Peer Mediator
- Posts: 15625
- Joined: Wed Nov 24, 2004 11:13 pm
- Location: In the darkness, where fear and knowing are one
- Contact:
-
The Dark Side of Will
- Peer Mediator
- Posts: 15625
- Joined: Wed Nov 24, 2004 11:13 pm
- Location: In the darkness, where fear and knowing are one
- Contact:
Re: The Mule rides again (sort of) - pics.
My dad had an ancient GM book (Standard Parts Catalog 89A, dated Oct 1992) that showed the terminal and part number:
-12040500 for 0.150" wide
-6288108 for 0.180" wide

No wonder people hate dealing with Power and Signal... they're website is complete shit.
http://www.powerandsignal.com/Delphi_12 ... l_Cab.aspx
-12040500 for 0.150" wide
-6288108 for 0.180" wide
No wonder people hate dealing with Power and Signal... they're website is complete shit.
http://www.powerandsignal.com/Delphi_12 ... l_Cab.aspx
-
The Dark Side of Will
- Peer Mediator
- Posts: 15625
- Joined: Wed Nov 24, 2004 11:13 pm
- Location: In the darkness, where fear and knowing are one
- Contact:
Re: The Mule rides again (sort of) - pics.
The Fiero pins are 0.180 wide, which means that the correct part number is 6288108.
-
The Dark Side of Will
- Peer Mediator
- Posts: 15625
- Joined: Wed Nov 24, 2004 11:13 pm
- Location: In the darkness, where fear and knowing are one
- Contact:
Re: The Mule rides again (sort of) - pics.
So I've been targeting the Texas Mile in October.
Maxton is too soon and the rules are too restrictive.
I have drill on the 16/17 July, 20/21 August & 17/18 September
July 23rd is 13 weeks out from Texas Mile. I have a SHITE TONNE of work to get done and not a whole lot of time... gotta get seriously organized.
Here's the beginning of my WBS:
This will go into MS Project for project planning data (IE, WBS numbers, successor data, parts cost, labor hours)
Here it is without the CODE tags, but the damned forum doesn't preserve my indention.
* = done
? = TBD

-Cooling System
   -Dual oil/water HEX's (with trans fluid HEX)
      -Measure out/in ports on side of extra block
      -Generic cooling hose fitments?
      -Design oil hoses and fittings
      -Design bracketry for outlet side HEX
      -Choose clamps/bracketry for inlet side HEX
   -Finish machining coolant bleed fitting
   -Install new engine-to-coolant-pipe hoses
*     -Buy hoses (CQ P/N's)
   -? Switch to '86 right side coolant & heater pipes
      -FIND '86 right side coolant pipe
      -FIND '86 right side heater pipe
   -? Install Northstar "around the engine" heater pipes
      -Find P/N
      -Check availability
   -Install bleed fitting
*     -10mm rubber sealed washer (McMaster P/N?)
*     -1/4-28 bleeder screw (Dorman P/N?)
   -Refill cooling system & re-heat cycle

-Engine/Power
   -Intake Pipe
      -Order aluminum tubing donuts from Oz
         -2x long rad, 2x short rad in 3.5"
      -Custom rolled 14ga 3.5" aluminum tubing from Excel
      -Build tube for MAF based throttle body
      -Choose/order K&N filter
   -Exhaust system
      -Order from RRE
         -2x 2.5" SS tubing donuts
      -Find suitable 2.5" SS flex couplings
      -Mock up modded front manifold on extra long block
      -Build system w/ cats & John Deer mufflers
   -Cams
      -Find cam P/N's confirming RB Int/Exh cams the same
      -Measure L37 Int/Exh cam lift curves
      -Install L37 intakes in exhaust locations
         -Measure resulting lift curve
         -? Modify sprockets
      -? Helicoil cam saddle bolt hole
   -Shelby PCM
*     -Have Steven wreck Buick PCM to salvage connectors
      -Get connectors & Buick PCM wreckage back from Steven
      -Make PCM wiring harness adapter
         -Download Shelby diagrams per Ryan/Sinister
         -Find & Order pins for Shelby PCM connectors
         -Include MAF wiring
            -Locate/buy MAF connector
      -Make IAC harness adapter
         -Locate/buy ISM opposite connector (4 pin flat metri-pack?)
         -Locate/buy IAC connector (4 pin square metri-pack?)
      -! Dyno Tune
      -Rework Harness
         -V2.0 Harness routing
         -Engine bay (fender well?) PCM mounting
         -? Nominally weather sealed box for PCM mounting
            -Grommets
   -Speedo ckt filter
*     -Buy parts, find wires
      -Build filter
      -Pot with JB Weld
         -Buy JB weld
      -Connectorize w/ 3 pin Molex
         -Order 3 pin Molex & pins
      -Work harness to include 3 pin Molex
   -Tach Installation
*     -Splice calibration wires
*     -Repair hook-up wires
      -Connectorize Tach w/ 6 pin Molex
         -Order 6 pin Molex
      -Pull leads from instrument panel connector
         -Order Bow pins for IP connector
         -Connectorize w/ 6 pin Molex
      -Weld tach bracket
         -Tabs for rally gauge mounting
         -Add section for tach mounting
         -Drill bracket and tach mounting holes
         -Blast(?) & paint
      -Install tach, reassemble IP
   -Crankshaft
      -Price quotes from Jim/SFL
      -Do the work
      -Return shipment
      -Buy std size bearings
         -? Long lead/? Summit
      -Install

-Driveline
   -3.94 w/ LSD
      -Ship LSD to Jeff for disassembly
      -Get the parts back
      -Ship LSD gears + 284 diff gears + 3.94 R&P to Liberty
         -Call Liberty for pricing/info
         -? Include ring gear bolts for cryo treatment
            -10x1.5 x 22mm Class 12.9 bolts (QTY 10)
         -? Include bearings
      -Get parts back
      -? Send out for RF85
      -LSD parts to Jeff to reassemble
      -Get assembly back
      -Check break-away torque
      -Assemble LSD to 3.94 ring gear (machine treated bolts?)
         -? Blue Loctite
      -Disassemble transmission
         -Install 3.94 OP shaft, 1st gear bearing & thrust washer into OP cluster
            -Deep fryer for heated press fits
            -Torque capacity due to polishing
         -Drill/tap holes at end of case to accept pipe plugs from outside
         -? Install/weld suction fitting for trans fluid cooler
         -? Install/weld return fitting for trans fluid cooler
         -Set LSD diff bearing preload w/ HTOB BH
      -? Modify HTOB BH for starter mounting
      -Reassemble transmission
   -? Clutch hyd mods for HTOB

-Fuel
   -Measure hot fuel pressure under load
   -? Replace fuel pump
      -Install Greer's dynamat-alike on tank while removed
   -Replace fuel filter
      -? Inspect/Re-engineer pressure line
   -Build pressure line clips at LR frame rail & L strut tower

-Body
   -Test plastic welding on gold nose
   -Weld tears and decorative seam in blue nose
   -Weld decorative seam on tail fascia
   -Front fenders
      -Remove fenders
      -Install headlight brain
         -? Functional
      -Install door detent springs
         -Order Rodney's tool
      -Re-work 1/4 turn fasteners
         -Order revised fastener parts
      -Install riv-nuts
         -Drill holes out
         -? Loctite MSRC or POR-15
   -Fix rust hole under passenger seat
      -Remove interior carpet
         -Shampoo/clean carpets
         -? Wash/replace sound insulation
      -Patch w/ carbon or fibreglass & POR-15 as resin
         -? Wash cat pee out of carbon cloth
   -Cut firewall cable pass-through panel out of blue car
      -Weld or rivet into The Mule
   -Torque strut/limiter/damper
      -Pull PS pump bracket from shelf PS Pump
      -Install bracket to engine
      -Design/build engine-side mount
      -Remove body side mount from blue car
         -Order spot weld cutter
      -Remove modified mounts from The Mule
      -Install blue car's metal in The Mule
      -Build hard strut
         -Start with body-side parts from gold '86
         -? Adapt engine shock or damper
   -Organize Roof painting with Zach Judd
   -? Get current or replacement hood painted
   -Doors
      -Adjust fit of windows into door weather stripping
      -Replace "dew wipes"
      -Remove door panel cladding
      -Remove broken trim strip clips
      -? Remove/paint door skins
         -POR-15 impact beams & internal components?
Maxton is too soon and the rules are too restrictive.
I have drill on the 16/17 July, 20/21 August & 17/18 September
July 23rd is 13 weeks out from Texas Mile. I have a SHITE TONNE of work to get done and not a whole lot of time... gotta get seriously organized.
Here's the beginning of my WBS:
This will go into MS Project for project planning data (IE, WBS numbers, successor data, parts cost, labor hours)
Code: Select all
* = done
? = TBD
-Cooling System
-Dual oil/water HEX's (with trans fluid HEX)
-Measure out/in ports on side of extra block
-Generic cooling hose fitments?
-Design oil hoses and fittings
-Design bracketry for outlet side HEX
-Choose clamps/bracketry for inlet side HEX
-Finish machining coolant bleed fitting
-Install new engine-to-coolant-pipe hoses
* -Buy hoses (CQ P/N's)
-? Switch to '86 right side coolant & heater pipes
-FIND '86 right side coolant pipe
-FIND '86 right side heater pipe
-? Install Northstar "around the engine" heater pipes
-Find P/N
-Check availability
-Install bleed fitting
* -10mm rubber sealed washer (McMaster P/N?)
* -1/4-28 bleeder screw (Dorman P/N?)
-Refill cooling system & re-heat cycle
-Engine/Power
-Intake Pipe
-Order aluminum tubing donuts from Oz
-2x long rad, 2x short rad in 3.5"
-Custom rolled 14ga 3.5" aluminum tubing from Excel
-Build tube for MAF based throttle body
-Choose/order K&N filter
-Exhaust system
-Order from RRE
-2x 2.5" SS tubing donuts
-Find suitable 2.5" SS flex couplings
-Mock up modded front manifold on extra long block
-Build system w/ cats & John Deer mufflers
-Cams
-Find cam P/N's confirming RB Int/Exh cams the same
-Measure L37 Int/Exh cam lift curves
-Install L37 intakes in exhaust locations
-Measure resulting lift curve
-? Modify sprockets
-? Helicoil cam saddle bolt hole
-Shelby PCM
* -Have Steven wreck Buick PCM to salvage connectors
-Get connectors & Buick PCM wreckage back from Steven
-Make PCM wiring harness adapter
-Download Shelby diagrams per Ryan/Sinister
-Find & Order pins for Shelby PCM connectors
-Include MAF wiring
-Locate/buy MAF connector
-Make IAC harness adapter
-Locate/buy ISM opposite connector (4 pin flat metri-pack?)
-Locate/buy IAC connector (4 pin square metri-pack?)
-! Dyno Tune
-Rework Harness
-V2.0 Harness routing
-Engine bay (fender well?) PCM mounting
-? Nominally weather sealed box for PCM mounting
-Grommets
-Speedo ckt filter
* -Buy parts, find wires
-Build filter
-Pot with JB Weld
-Buy JB weld
-Connectorize w/ 3 pin Molex
-Order 3 pin Molex & pins
-Work harness to include 3 pin Molex
-Tach Installation
* -Splice calibration wires
* -Repair hook-up wires
-Connectorize Tach w/ 6 pin Molex
-Order 6 pin Molex
-Pull leads from instrument panel connector
-Order Bow pins for IP connector
-Connectorize w/ 6 pin Molex
-Weld tach bracket
-Tabs for rally gauge mounting
-Add section for tach mounting
-Drill bracket and tach mounting holes
-Blast(?) & paint
-Install tach, reassemble IP
-Crankshaft
-Price quotes from Jim/SFL
-Do the work
-Return shipment
-Buy std size bearings
-? Long lead/? Summit
-Install
-Driveline
-3.94 w/ LSD
-Ship LSD to Jeff for disassembly
-Get the parts back
-Ship LSD gears + 284 diff gears + 3.94 R&P to Liberty
-Call Liberty for pricing/info
-? Include ring gear bolts for cryo treatment
-10x1.5 x 22mm Class 12.9 bolts (QTY 10)
-? Include bearings
-Get parts back
-? Send out for RF85
-LSD parts to Jeff to reassemble
-Get assembly back
-Check break-away torque
-Assemble LSD to 3.94 ring gear (machine treated bolts?)
-? Blue Loctite
-Disassemble transmission
-Install 3.94 OP shaft, 1st gear bearing & thrust washer into OP cluster
-Deep fryer for heated press fits
-Torque capacity due to polishing
-Drill/tap holes at end of case to accept pipe plugs from outside
-? Install/weld suction fitting for trans fluid cooler
-? Install/weld return fitting for trans fluid cooler
-Set LSD diff bearing preload w/ HTOB BH
-? Modify HTOB BH for starter mounting
-Reassemble transmission
-? Clutch hyd mods for HTOB
-Fuel
-Measure hot fuel pressure under load
-? Replace fuel pump
-Install Greer's dynamat-alike on tank while removed
-Replace fuel filter
-? Inspect/Re-engineer pressure line
-Build pressure line clips at LR frame rail & L strut tower
-Body
-Test plastic welding on gold nose
-Weld tears and decorative seam in blue nose
-Weld decorative seam on tail fascia
-Front fenders
-Remove fenders
-Install headlight brain
-? Functional
-Install door detent springs
-Order Rodney's tool
-Re-work 1/4 turn fasteners
-Order revised fastener parts
-Install riv-nuts
-Drill holes out
-? Loctite MSRC or POR-15
-Fix rust hole under passenger seat
-Remove interior carpet
-Shampoo/clean carpets
-? Wash/replace sound insulation
-Patch w/ carbon or fibreglass & POR-15 as resin
-? Wash cat pee out of carbon cloth
-Cut firewall cable pass-through panel out of blue car
-Weld or rivet into The Mule
-Torque strut/limiter/damper
-Pull PS pump bracket from shelf PS Pump
-Install bracket to engine
-Design/build engine-side mount
-Remove body side mount from blue car
-Order spot weld cutter
-Remove modified mounts from The Mule
-Install blue car's metal in The Mule
-Build hard strut
-Start with body-side parts from gold '86
-? Adapt engine shock or damper
-Organize Roof painting with Zach Judd
-? Get current or replacement hood painted
-Doors
-Adjust fit of windows into door weather stripping
-Replace "dew wipes"
-Remove door panel cladding
-Remove broken trim strip clips
-? Remove/paint door skins
-POR-15 impact beams & internal components?
-
The Dark Side of Will
- Peer Mediator
- Posts: 15625
- Joined: Wed Nov 24, 2004 11:13 pm
- Location: In the darkness, where fear and knowing are one
- Contact:
Re: The Mule rides again (sort of) - pics.
Is Mikronite out of business?
Re: The Mule rides again (sort of) - pics.
So are you proposing you plan to get all that work done by October? Deadlines are a wonderful thing, but I think either your level of expectation or your timeline needs to shift, you're way too much of a perfectionist to hit that date based on what I've seen from you in the past. 
In either case, good luck...that least sounds fun. (No, really!)
Bryce
In either case, good luck...that least sounds fun. (No, really!)
Bryce
-
Shaun41178(2)

- Posts: 8367
- Joined: Fri Nov 19, 2004 7:12 pm
- Location: Ben Phelps is an alleged scammer
Re: The Mule rides again (sort of) - pics.
I can find this out for you in a day or two. They used to be local. But when Crane shut down, not sure if the Mikronite went too. I know someone who will know, so let me talk to him.The Dark Side of Will wrote:Is Mikronite out of business?
-
The Dark Side of Will
- Peer Mediator
- Posts: 15625
- Joined: Wed Nov 24, 2004 11:13 pm
- Location: In the darkness, where fear and knowing are one
- Contact:
Re: The Mule rides again (sort of) - pics.
I found some articles about mentioning their acquisition of Crane; can't find the mikronite website; their primary aftermarket distributor has a big banner saying "no more mikronite" on their website... Probably a safe bet they're out of the game.
So metal treatments take on basically two forms that I've been able to find:
1. Heat treatments: Cryogenic treatment is the most common, but should properly be used in conjunction with a re-tempering to make sure the part doesn't get too hard and brittle. I've only found a couple of places that talk about this.
2. Shot peening, polishing and combinations thereof: These range from simple shot peening and polishing to procedures like mikroniting. There are a couple of others, too: WPC & RF85 that appear to use the same idea. Imparting compressive surface stresses to mitigate the ability of tensile surface stresses to nucleate cracks, followed by or included with polishing to remove stress risers and reduce friction/micro-galling.
Trying to put together a comprehensive package for my 3.94 FD R&P and the side and spider gears from the later large 282 diff and a 284 diff.
-
The Dark Side of Will
- Peer Mediator
- Posts: 15625
- Joined: Wed Nov 24, 2004 11:13 pm
- Location: In the darkness, where fear and knowing are one
- Contact:
Re: The Mule rides again (sort of) - pics.
Can't find 2.5" stainless steel tubing donuts to save my soul.
Burns Stainless has 90 degree bends with CLR = D, but the $ per degree is about twice what it would be for donuts.
Ordering 3.5" aluminum donuts halves, short radius and long radius from the outfit in Australia.
Burns Stainless has 90 degree bends with CLR = D, but the $ per degree is about twice what it would be for donuts.
Ordering 3.5" aluminum donuts halves, short radius and long radius from the outfit in Australia.
-
The Dark Side of Will
- Peer Mediator
- Posts: 15625
- Joined: Wed Nov 24, 2004 11:13 pm
- Location: In the darkness, where fear and knowing are one
- Contact:
Re: The Mule rides again (sort of) - pics.
So I had a *DUH* moment...
The flight assurance lead for the program I'm working on was in a motorcycle accident a couple of weeks ago. He's awake and doing well... not sure if he's still in the ICU.
However, it looks as though I will most likely be taking his place on the launch campaign... In Kazakhstan... for six weeks...
So I won't be running the Texas Mile this October... but I also don't need to bust hump to get all of this stuff done by the end of October, either.
-
The Dark Side of Will
- Peer Mediator
- Posts: 15625
- Joined: Wed Nov 24, 2004 11:13 pm
- Location: In the darkness, where fear and knowing are one
- Contact:
Re: The Mule rides again (sort of) - pics.
Been slammed last week with work and skool.
Should be able to put together a bunch of orders to get most of the parts I need tomorrow.
I ordered the aluminum donut halves, which should be here some time this week.
The mounting pattern for the rally gauge panel is 7 1/2 x 1 23/32 and has 3/16 holes. FYI.
I ordered a bunch of Molex pins and connectors, which arrived. I entered those into inventory. I will most likely not get around to connectorizing the tach or building the speedometer filter circuit this weekend. This weekend has mostly been school work and will be some paper work in terms of getting orders ready.
-
The Dark Side of Will
- Peer Mediator
- Posts: 15625
- Joined: Wed Nov 24, 2004 11:13 pm
- Location: In the darkness, where fear and knowing are one
- Contact:
Re: The Mule rides again (sort of) - pics.
Terminal Supply in Troy, MI had 58 of these in stock @ $0.77 each. I cleaned them out, even though I only need 6.The Dark Side of Will wrote:The Fiero pins are 0.180 wide, which means that the correct part number is 6288108.
Have gotten exactly nothing done to The Mule in the last month because I've been completely slammed between work, school and Navy. I've been at work 12+ hours a day 7 days a week for the last three weeks. I just had the Pre-Ship review for the satellite I've been working on and my group's final presentation for class is tomorrow. I have drill next weekend and will leave for the land of the Cossacks the weekend after that. After that I won't be back in the country until the 2nd week of October
-
The Dark Side of Will
- Peer Mediator
- Posts: 15625
- Joined: Wed Nov 24, 2004 11:13 pm
- Location: In the darkness, where fear and knowing are one
- Contact:
Re: The Mule rides again (sort of) - pics.
My functional manager renegotiated my travel plans without telling me. Fail.
Chassis Shop called and said they have the 2.5" SS donuts in stock. WIN!

Chassis Shop called and said they have the 2.5" SS donuts in stock. WIN!
-
The Dark Side of Will
- Peer Mediator
- Posts: 15625
- Joined: Wed Nov 24, 2004 11:13 pm
- Location: In the darkness, where fear and knowing are one
- Contact:
Re: The Mule rides again (sort of) - pics.
Now that I have 2.5" donuts on the way, I can actually make progress on the exhaust.
What's everyone's favorite source for 2.5" stainless flex sections?
EDIT: SPD appears to have decent ones WITHOUT internal braiding: http://www.spdexhaust.com/pdfs/AccPDFs/Bellows.pdf
EDIT: found the thread I remembered about flex sections: phpBB/viewtopic.php?f=3&t=9962
And still looking for mufflers... I'm starting to think I should just commission SpinTech to build exactly what I (we, the Fiero community) need.
-
The Dark Side of Will
- Peer Mediator
- Posts: 15625
- Joined: Wed Nov 24, 2004 11:13 pm
- Location: In the darkness, where fear and knowing are one
- Contact:
Re: The Mule rides again (sort of) - pics.
These guys:The Dark Side of Will wrote:The Fiero pins are 0.180 wide, which means that the correct part number is 6288108.

In order to minimize the number of changes at once, I'm going to build a harness adapter in order to use the Shelby computer with my current harness. All of the following parts will have to be added to it.
Altrbo was nice enough to put his mad JDM tyte j0 NASA skillz to work and rip the connectors off a '90's Buick PCM for me. These are the same connectors used by the OBDI Caddy PCM. Sinister was able to get me a pigtail with the Shelby computer. I'll marry these up to the pigtail to make the adapter.


This is a MAF sensor connector. That should be fairly straight forward. I believe these are available through CarQuest. I'll just have to run an independent pigtail to it from the ECM harness adapter which will be inside the car with the ECM.

This is the IAC connector. That one in and of itself won't be a problem either. However, it will need to be part of a second smaller harness adapter which will adapt the ISM wiring for the '93-'95 throttle body I currently have to the IAC connector on the '96+ throttle body I'm going to use. The ISM uses what is essentially a 4 pin weatherpak, BUT the connector position assurance (CPA) clip is at one end of the connector for the ISM, while it's in the middle for the standard 4 pin weatherpack.

Once the Shelby computer is installed, tuned and has some trouble-free miles on it, I'll completely rework the harness into Northstar-Fiero Harness v. 2.0. That will change the routing to keep more wiring out of sight and possibly more the ECM to the engine bay or into the wheel house behind the quarter panel.
-
The Dark Side of Will
- Peer Mediator
- Posts: 15625
- Joined: Wed Nov 24, 2004 11:13 pm
- Location: In the darkness, where fear and knowing are one
- Contact:
Re: The Mule rides again (sort of) - pics.
Here we go again... SPD's out of stock of their 2.5" flex sections.
They were perfect, too... 4" overall length without internal braid.
http://www.spdexhaust.com/pdfs/AccPDFs/Bellows.pdf
Without internal braid, 6" long:
http://www.pfabrications.com/inc/sdetail/808
With internal braid (bleh!), 4" collar-to-collar, 8" overall:
http://www.cxracing.com/mm5/merchant.mv ... PE-250x4-E
With internal braid, 6" long:
http://www.meganracingperformance.com/f ... 16948.html
-
The Dark Side of Will
- Peer Mediator
- Posts: 15625
- Joined: Wed Nov 24, 2004 11:13 pm
- Location: In the darkness, where fear and knowing are one
- Contact:
Re: The Mule rides again (sort of) - pics.
White Racing Products sells these terminals. They are a specialty C4 Corvette ZR1 shop...The Dark Side of Will wrote:My dad had an ancient GM book (Standard Parts Catalog 89A, dated Oct 1992) that showed the terminal and part number:
-12040500 for 0.150" wide
-6288108 for 0.180" wide
http://www.whiteracingproducts.com/inde ... _id=118165
-
The Dark Side of Will
- Peer Mediator
- Posts: 15625
- Joined: Wed Nov 24, 2004 11:13 pm
- Location: In the darkness, where fear and knowing are one
- Contact:
Re: The Mule rides again (sort of) - pics.
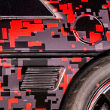
Today was my first day off in five or six weeks. I got a few things done to the car.
Added (and tested!) the tach wires to the instrument panel trunk:

Implemented (and tested!) the "bulb test/Temp gauge" wiring fix:


I realized after swapping the pins in the engine side of the C500 that the "right way" from the systems perspective would have been to swap the pins in the *body* side of the C500...
Got the tach bracket far enough along to bolt in:


Built (and tested!) the speedometer signal filter to go between the ECM's 0-5V square wave output and the speed sensor buffer input expecting a zero crossing sine wave:


I now have a working, accurate speedometer--a first while having the car running with this transmission and the magnetic VSS--and will shortly have an accurate tach. I drove around with the Autometer plugged in but not mounted. The OE tach reads 2500 when the AM reads 2000, 5000 vs. 4000, etc. I haven't compared the AM reading directly against the datastream yet, but it matches the datastream side of the error table I'd laid out for the OE tach. I have no reason to expect it to be other than accurate.
Tomorrow I should be able to snag a pic of all the donuts and donut halves I now own.
Added (and tested!) the tach wires to the instrument panel trunk:
Implemented (and tested!) the "bulb test/Temp gauge" wiring fix:
I realized after swapping the pins in the engine side of the C500 that the "right way" from the systems perspective would have been to swap the pins in the *body* side of the C500...
Got the tach bracket far enough along to bolt in:
Built (and tested!) the speedometer signal filter to go between the ECM's 0-5V square wave output and the speed sensor buffer input expecting a zero crossing sine wave:
I now have a working, accurate speedometer--a first while having the car running with this transmission and the magnetic VSS--and will shortly have an accurate tach. I drove around with the Autometer plugged in but not mounted. The OE tach reads 2500 when the AM reads 2000, 5000 vs. 4000, etc. I haven't compared the AM reading directly against the datastream yet, but it matches the datastream side of the error table I'd laid out for the OE tach. I have no reason to expect it to be other than accurate.
Tomorrow I should be able to snag a pic of all the donuts and donut halves I now own.
-
Series8217
- 1988 Fiero Track Car
- Posts: 5975
- Joined: Thu Jun 02, 2005 9:47 pm
- Location: Los Angeles, CA
Re: The Mule rides again (sort of) - pics.
Jeez, that tach mount bracket looks intense. How much does the tach weigh?
-
The Dark Side of Will
- Peer Mediator
- Posts: 15625
- Joined: Wed Nov 24, 2004 11:13 pm
- Location: In the darkness, where fear and knowing are one
- Contact:
Re: The Mule rides again (sort of) - pics.
Lol... The tach's probably 6 or 8 oz... I haven't weighed it.
I built the bracket like that because I don't want it to be bouncing around like some cheap aftermarket ricer--wait... umm...
After playing with it for a bit, it's probably plenty stiff bolted to the cluster hard points without the tie-in to the rally gauge pod. I'm not sure that would do much for it anyway.
I can always drive around without a rally gauge pod for a little while to assess whether I should keep that attachment or cut it off.
That's probably the one part of the car that I hot-rodded rather than engineering. I grabbed a random piece of angle and started cutting without a clear idea of what I wanted the finished product to look like.
As promised, here's a picture of my donut collection:

Along with catalysts, manifolds and a bit of straight tubing. The aluminum donut halves are for the CAI. They are 3.5" on either short or long radius... don't have the numbers in front of me. The two remaining donuts on the right are SS 2.5" pieces that I waited a month and a half for. The donut on the left is a 3.5" mild steel unit that I bought before I realized that trying to reuse the base for the Fiero filter can with the CAI welded into it is dumb. I gain considerable design flexibility, lose weight and decrease packaging volume by getting rid of the factory part entirely and using aluminum. I can still fab tabs to use the stock body attachment points, which I intend to do.
These are the rivnuts I installed at the bottom rear edge of each fender. They replace some obnoxious plastic pop-rivets that GM used.

Along with those, I also reinstalled the headlight brain, so my headlights go up and down again. I also installed the door hinge detent springs in both doors. Rodney's installation tool is the *ONLY* way to do that. Well worth the $17 or whatever it costs. Makes the job a breeze and is way over built.
I also used my plastic welding kit for the first time. I had intended to learn on an extra junk nose I've had around for a while, but had the fender off and was running out of time, so I elected to learn on the fender. It's not *that* ugly, but it is ugly. Pics to follow.
I built the bracket like that because I don't want it to be bouncing around like some cheap aftermarket ricer--wait... umm...
After playing with it for a bit, it's probably plenty stiff bolted to the cluster hard points without the tie-in to the rally gauge pod. I'm not sure that would do much for it anyway.
I can always drive around without a rally gauge pod for a little while to assess whether I should keep that attachment or cut it off.
That's probably the one part of the car that I hot-rodded rather than engineering. I grabbed a random piece of angle and started cutting without a clear idea of what I wanted the finished product to look like.
As promised, here's a picture of my donut collection:
Along with catalysts, manifolds and a bit of straight tubing. The aluminum donut halves are for the CAI. They are 3.5" on either short or long radius... don't have the numbers in front of me. The two remaining donuts on the right are SS 2.5" pieces that I waited a month and a half for. The donut on the left is a 3.5" mild steel unit that I bought before I realized that trying to reuse the base for the Fiero filter can with the CAI welded into it is dumb. I gain considerable design flexibility, lose weight and decrease packaging volume by getting rid of the factory part entirely and using aluminum. I can still fab tabs to use the stock body attachment points, which I intend to do.
These are the rivnuts I installed at the bottom rear edge of each fender. They replace some obnoxious plastic pop-rivets that GM used.
Along with those, I also reinstalled the headlight brain, so my headlights go up and down again. I also installed the door hinge detent springs in both doors. Rodney's installation tool is the *ONLY* way to do that. Well worth the $17 or whatever it costs. Makes the job a breeze and is way over built.
I also used my plastic welding kit for the first time. I had intended to learn on an extra junk nose I've had around for a while, but had the fender off and was running out of time, so I elected to learn on the fender. It's not *that* ugly, but it is ugly. Pics to follow.