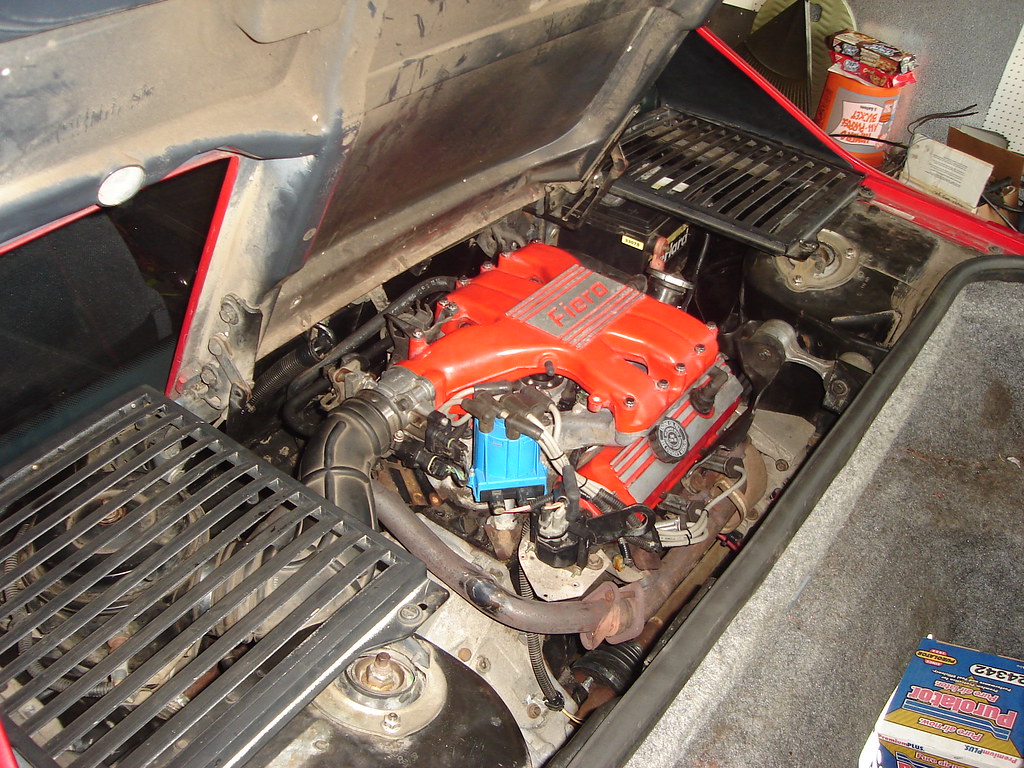
As you guys have seen, I'm getting a Formula ready for the Grassroots Motorsports $2009 Challenge. I don't have time to swap out the 2.anchor in the back, so I have to make due with what I've got. I need to clean up the engine bay in the back for the car show portion and I'd like to reduce a lot of clutter. Things I'd like to do:
- Remove EGR related equipment
- Remove as much plumbing as possible
- Remove as many vacuum lines as possible
- Relocate required components to hide them out of view
- Hide as much wiring harness as possible
Ideally, I'd like to avoid check engine lights, whether it requires tricking the ECM or flashing the chip to ignore certain things...as long as it runs ok, any method is acceptable. I don't have much money at all to spend, but I can fabricate stuff pretty quickly. I don't want to do a polish/chrome type of engine bay, I still want it to look like something the factory would make but cleaned up and with reduced clutter. I can powdercoat/paint/fabricate where needed.
If anybody has some builds/pics of cleaned up stock 2.8 engine bays and/or any tips on how to do the things above quick and easy, I'd appreciate some help. This stuff is probably old hat for some of you guys, but I've never bothered to clean up the 2.8 and since I'm really short on time I am hoping to learn quick from others.
Thanks for any help.
Bryce
Quick and easy engine bay cleanup
Moderators: The Dark Side of Will, Series8217
-
CincinnatiFiero
- Posts: 2908
- Joined: Thu Dec 20, 2007 2:47 pm
- Location: Columbus, Ohio
Re: Quick and easy engine bay cleanup
I ran a plated off EGR for two years with no lights and a plugged vacuum line.
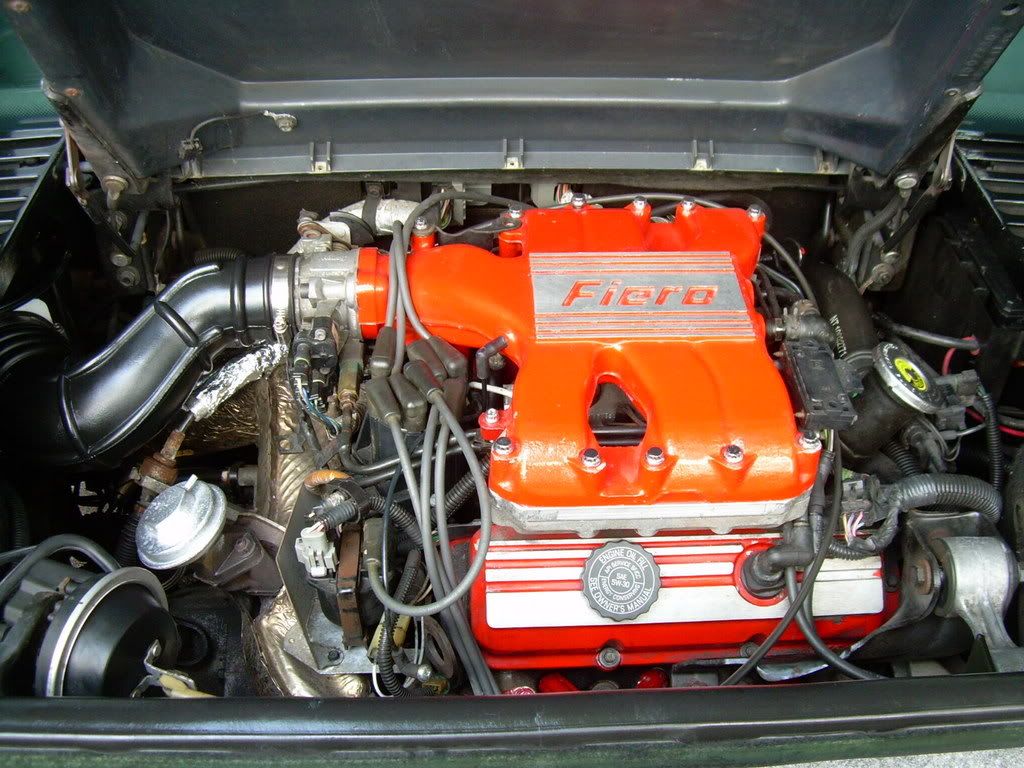
Painting them middle intake silver and a fresh coat of red on the valve covers and upper intake made a big difference since they are such dominating parts of the engine and the red is really flash. I even painted my throttle body with the same high temp silver I did the middle intake in. You can't get past the pitting and narstyness of aluminum without paint.
I always use some paint thinner and a paper towel and clean all of the visible wiring, restores the color to them. Makes a noticeable difference.
Since you're trying to optimize the go go of the 2.8 you ought to port up the intake when you paint it, if you've got the time, take the casting lines off the upper intake, I don't have a pic of the one we did.
May as well port the headers up too, and spray them with some black header paint. Black makes parts disappear but I'd rather certain parts disappear than be rusty.
Classic degreaser and a brush will make the tranny look better.
Hit everything rubber with tire shine, the intake boot, vac lines, hell even some of the battery cables.
-
CincinnatiFiero
- Posts: 2908
- Joined: Thu Dec 20, 2007 2:47 pm
- Location: Columbus, Ohio
Re: Quick and easy engine bay cleanup
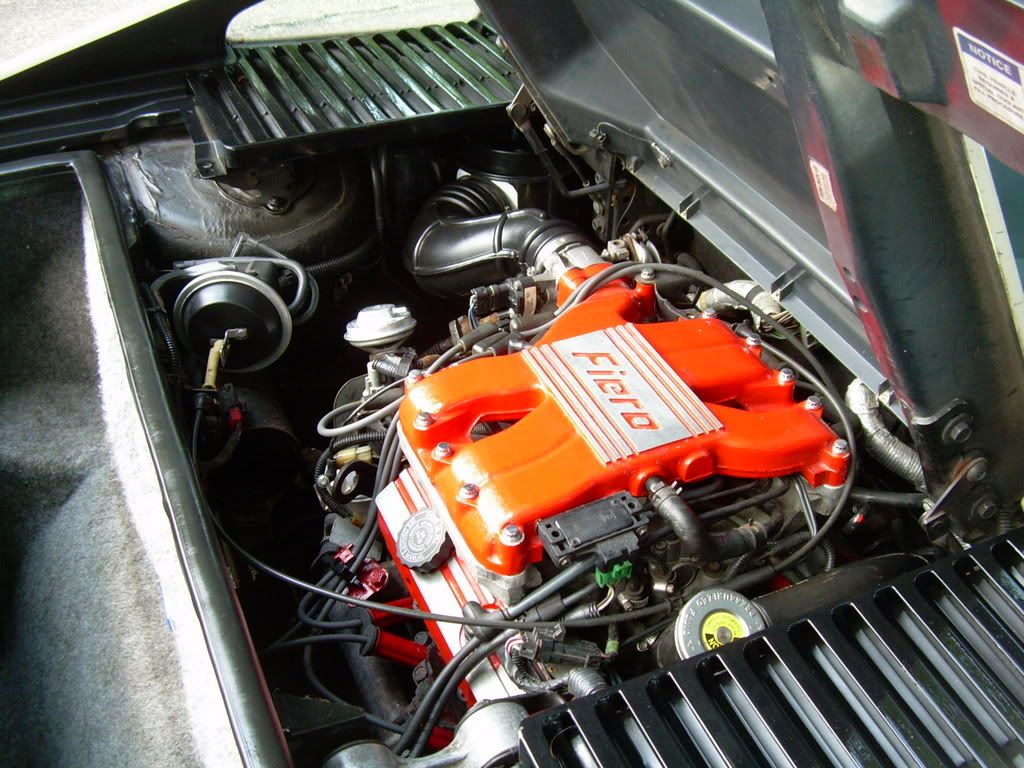
Really old pics, that's actually pre-painted intakes.
-
Shaun41178(2)

- Posts: 8464
- Joined: Fri Nov 19, 2004 7:12 pm
- Location: Ben Phelps is an alleged scammer
Re: Quick and easy engine bay cleanup
There is a guy on here that sells the egr blockoff plates and the chip to keep from tripping the codes. I don't think its that much. I think its Oslo.
When I had my factory intake on my turbo car I had two vacuum lines only. One of course was for the map sensor, and of course that T's off and goes to the FPR. Thats it!. Now with my custom intake, thats still all I have.
If you take out cruise you don't need any of that junk. If you take out your egr you don't need any of that junk either. That eliminates almost all the lines right there. I plugged off the vacuum lines that are in the TB and removed those as well.
FieroPhrek working on that ls4 swap for 18 years and counting now. 18 years!!!!! LOL
530 whp is greater than 312
530 whp is greater than 312

Re: Quick and easy engine bay cleanup
I cut my own EGR blockoff out of 16ga steel and hit it on both sides with silicone header coating.
TB cooling lines ripped out, welded shut on the t-stat housing.
Cold start injector switch pulled from lower intake, plugged with 3/8"NPT plug from the hardware store, the CSI hole in the LIM got plugged with a 7/8" freeze plug, and the fuel line for it plugged at the rail with a M12x1.5 bolt and some blue loctite. The wiring for it gets removed at a fusible link attached to the starter, and IIRC a ground at a splice in the main harness near the t-stat housing. I went another step and got rid of the 6-pin weatherpack connector for the fuel injection harness and replaced it with a 4 pin one after I removed the wires for the CSI.
The EGR valve vacuum bleed filter and position sensor I removed, eliminated the vac lines to it, and so far just let the wiring dangle. With no computer mods, my SES light only comes on after I sustain over 70mph for 10 minutes.
I also rerouted the vacuum lines for the canister purge valve so they're hidden behind the airfilter instead of wrapping 3/4 of the way around the engine compartment and draping over the valve cover.


Edit: Yea, I know that with the truleo I ran things differently than you'll have to, but most of it applies.
Re: Quick and easy engine bay cleanup
Thanks guys, keep the good ideas coming. Most of this sounds very easily do-able in my time/budget window. I am thinking about relocating the bulkhead connector and ECM, anybody tried that? Obviously, I'd want to avoid cutting/splicing if possible, but I think it will clean up the engine bay AND the interior a lot, so I could kill two birds with one stone. Oh yeah, I should mention the interior will be stripped bare.
Bryce
Bryce
-
CincinnatiFiero
- Posts: 2908
- Joined: Thu Dec 20, 2007 2:47 pm
- Location: Columbus, Ohio
Re: Quick and easy engine bay cleanup
The C203 won't move, you'd have to lengthen those wires.
I've got stainless EGR plates if you wanted them, the one that goes under the intake and the one that goes under the EGR valve itself. I never removed the valve itself, so the only one you'd want is the one on the bottom of the intake.
Oslo doesn't sell the chip or at least didn't, he was referring people to Ryan.
Killing the evap system will take a lot out of the bay.
Agreed on the Throttle body heater, I just ran a short hose from one point to the other on the coolant neck, I didn't know how to weld then. The MAP sensor bracket is welded to the TB heater lines, so keep that in mind.
I've always been partial to removing the nasty, splitting, fraying sound deadener in the engine bay. I then buy that Duplicolor rubberized undercoating at pep boys, often on buy one get one for like $5.99 and spray the bay down.
Re: Quick and easy engine bay cleanup
CincinnatiFiero wrote:The MAP sensor bracket is welded to the TB heater lines, so keep that in mind.
That's no big deal, just cut the lines off the bracket.
Re: Quick and easy engine bay cleanup
As stated above, remove everything egr, cruise, and evap (or mount it in the passenger wheel well since you have the expansion tank)related.
Then move on to the throttle body coolant lines and unscrew the fittings at the throttle body, pull the upper plenum and simplify and reroute the only remaining vacuum lines. You can use the old EGR port at the bottom of the plenum for all Vacuum sorces and remove/cap all other visable vacuum ports. Try to mount the map sensor under the upper plenum and clean up the coolant fittings on the thermostat housing.
Then start on the wires. The front bank spark plug wires can go under the throttle body neck (nothing should cross over the plenum) and the wires to the rear bank should be ran in an orderly fashion. Cut to fit wires can really clean up the spark plug wire routing.
All wire looms should blend in to the background and ran in an orderly fashion.
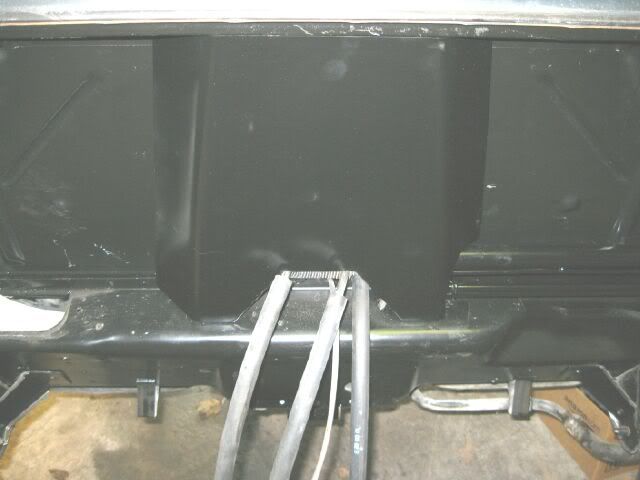
If you want to put some work into it, then you can relocate the 500 connector and move the bulkhead connectors down by the shifter area... but both of these will require some time with the soldering iron. Another option is to make a small cover for the connector pass through area like this:
Then move on to the throttle body coolant lines and unscrew the fittings at the throttle body, pull the upper plenum and simplify and reroute the only remaining vacuum lines. You can use the old EGR port at the bottom of the plenum for all Vacuum sorces and remove/cap all other visable vacuum ports. Try to mount the map sensor under the upper plenum and clean up the coolant fittings on the thermostat housing.
Then start on the wires. The front bank spark plug wires can go under the throttle body neck (nothing should cross over the plenum) and the wires to the rear bank should be ran in an orderly fashion. Cut to fit wires can really clean up the spark plug wire routing.
All wire looms should blend in to the background and ran in an orderly fashion.
If you want to put some work into it, then you can relocate the 500 connector and move the bulkhead connectors down by the shifter area... but both of these will require some time with the soldering iron. Another option is to make a small cover for the connector pass through area like this:
Re: Quick and easy engine bay cleanup
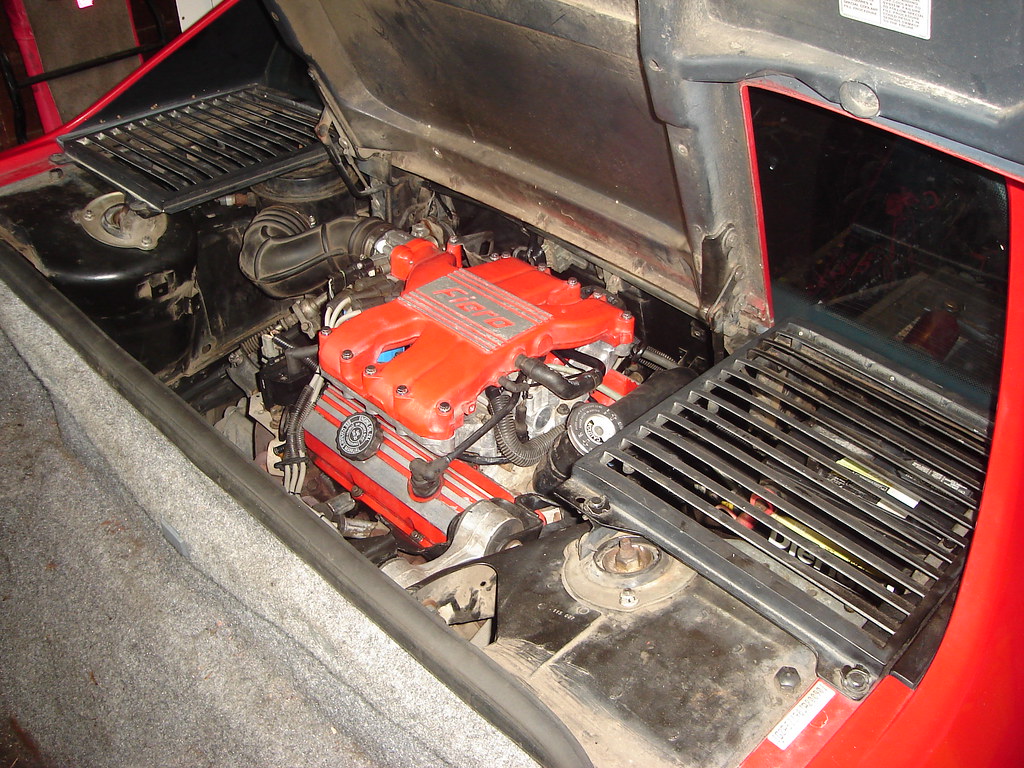
I've done most of the mods suggested above. A quick list, off the top of my head:
- Removed everything for the EGR. This includes wiring, vacuum lines, blocking off the intake, cutting the port off the Y-pipe and welding in a patch.
- Stripped every last bit of conduit and tape from the wire harness and rerouted, taped, etc. to clean up the routing. Only ended up cutting and resplicing a couple of wires.
- Relocated oil pressure sensor to immediately above the oil filter with a 1/8" NPT to 1/4" NPT adapter, ditching the stock relocation tube needed for the AC compressor.
- Ditched the AC compressor. Everything else AC related has already been pulled.
- Relocated tach filter and MAP sensor under the upper intake, spliced vacuum for FPR as necessary.
- Removed throttle body coolant lines, adapter fittings at the throttle body, and cut/welded thermostat housing ports.
- Removed everything for the cold start injector. This includes CSI, temp sensor, wiring, and fuel tube.
- Removed everything related to the evap control.
- Removed all the old metal air/vacuum tubes from the engine bay.
- Removed nearly all the heatshields and all of the horrible insulation material. I did leave the heat shield that goes between the trunk and the muffler.
- Shortened spark plug wires to bare minimum length without chaffing.
- Re-routed wire harness and retaped/recovered the entire thing to look factory.
- Relocated C203 connector to be under the battery. Chose to cut and splice the five wires that route back to the taillights rather than pulling pins or bodywork to get them out.
- Removed the heat shield off the Y-pipe.
- Removed the leaf catchers from the engine vents.
- Removed the wiring for the rear decklid. This car didn't come with a light, so it wasn't serving a hell of a lot of purpose other than perhaps telling me that the trunk is a jar.
- Stripped and repainted the coolant crossover tube and exhaust tips.
The above cost me about $6 total. There's more I'd like to do if I get more time, but this works for now. The "best tip of this thread" award goes to lucky for suggesting the 7/8" freeze plug to fill the hole left by the CSI. Sure, it cost me a buck, but it looks totally factory and will definitely work better than the free block off plate I planned on making.
Thanks,
Bryce
Re: Quick and easy engine bay cleanup
That looks very good! I would also suggest removing the metal tabs on the driver strut tower that used to hold the evap lines.Nashco wrote:
Thanks,
Bryce
Re: Quick and easy engine bay cleanup
Thanks for the props, but I can't take credit for it, someone else on here said it about a week or two before I did it myself.
EDIT: Oh yea, looks good!!
EDIT: Oh yea, looks good!!