Page 2 of 74
Re: The Mule rides again (sort of) - pics.
Posted: Tue Feb 01, 2011 3:05 pm
by Indy
Check out 5448T12. At $4.45 each they're a little pricey for something you would still have to modify, but it would be an easy starting point. All you would have to do is chuck it in the lathe, probably turn the OD of the flange down some, and part the top part off. Mcmaster probably has something like this for cheaper if you spend enough time navigating the same menu options in different orders

There are NAS (or maybe AN?) centering washers, but I can't remember the specification number. I've used them at work a couple of times a while back.
Since the washer sets share the same curvature, you could also mix and match the M12 convex with the M16 concave.
ETA: Looks like your M16 set specifies a 22mm spherical radius, not 17mm. Be advised.
Re: The Mule rides again (sort of) - pics.
Posted: Wed Feb 02, 2011 10:09 am
by The Dark Side of Will
Indy wrote:Check out 5448T12. At $4.45 each they're a little pricey for something you would still have to modify, but it would be an easy starting point. All you would have to do is chuck it in the lathe, probably turn the OD of the flange down some, and part the top part off. Mcmaster probably has something like this for cheaper if you spend enough time navigating the same menu options in different orders
There are NAS (or maybe AN?) centering washers, but I can't remember the specification number. I've used them at work a couple of times a while back.
Since the washer sets share the same curvature, you could also mix and match the M12 convex with the M16 concave.
ETA: Looks like your M16 set specifies a 22mm spherical radius, not 17mm. Be advised.
Brief discussion with a machinist tells me we can modify the concave washers in a collet in the small Hardinge using a boring bar. That ought to be quick and repeatable.
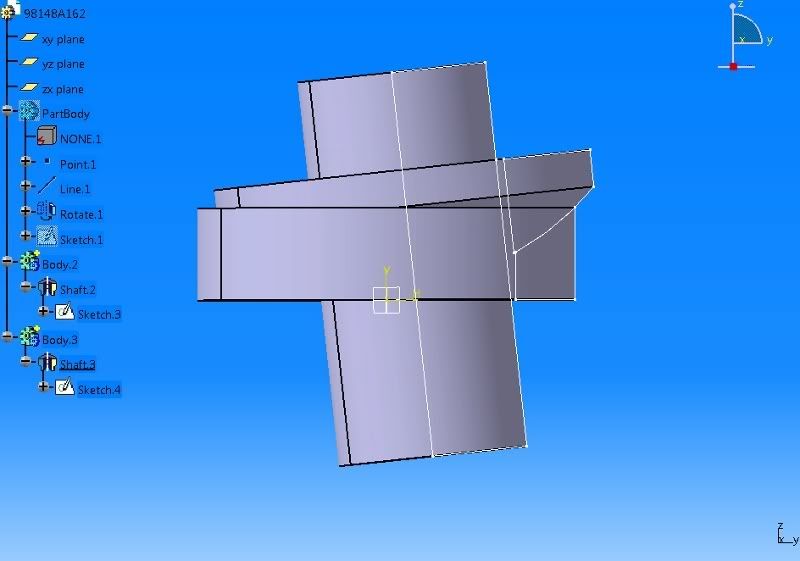
BOTEC's tell me we want to open the 14.2mm holes in the 98148A162 set to 16.4mm to double the angular range to 6 degrees. Can you confirm via CAD?
Re: The Mule rides again (sort of) - pics.
Posted: Wed Feb 02, 2011 2:28 pm
by Indy
The Dark Side of Will wrote:
Brief discussion with a machinist tells me we can modify the concave washers in a collet in the small Hardinge using a boring bar. That ought to be quick and repeatable.
BOTEC's tell me we want to open the 14.2mm holes in the 98148A162 set to 16.4mm to double the angular range to 6 degrees. Can you confirm via CAD?
Yup, 6.5+. There would still be a couple millimeters of bearing contact left in the radial direction, too.
Re: The Mule rides again (sort of) - pics.
Posted: Wed Feb 02, 2011 2:53 pm
by The Dark Side of Will
Indy wrote:The Dark Side of Will wrote:
Brief discussion with a machinist tells me we can modify the concave washers in a collet in the small Hardinge using a boring bar. That ought to be quick and repeatable.
BOTEC's tell me we want to open the 14.2mm holes in the 98148A162 set to 16.4mm to double the angular range to 6 degrees. Can you confirm via CAD?
Yup, 6.5+. There would still be a couple millimeters of bearing contact left in the radial direction, too.
Cool. What diameter would I need for only 6 degrees? I think I need 5 and want 6 just for margin... 6.5 is removing more material than necessary.
I know it's splitting hairs to some extent, but you've demonstrated that you're good at that.

Re: The Mule rides again (sort of) - pics.
Posted: Wed Feb 02, 2011 5:16 pm
by AkursedX
Do you guys have a visual as to what you are trying to do? I'm admittedly lost right now.
Re: The Mule rides again (sort of) - pics.
Posted: Wed Feb 02, 2011 7:20 pm
by Indy
About 15.8mm for 6°. There's still a small margin there because I'm assuming a centered bolt. If you really want to split hairs you could probably get 6 degrees with 14.9mm if you account for the bolt shifting off the centerline of the convex washer.
Re: The Mule rides again (sort of) - pics.
Posted: Thu Feb 03, 2011 9:04 am
by The Dark Side of Will
AkursedX wrote:Do you guys have a visual as to what you are trying to do? I'm admittedly lost right now.
Go to
www.mcmaster.com and enter 98148A162 in the search box. That's the part we're talking about modifying.
That's obviously just one part necessary for the modification I want to make to the car... Do you understand what I'm trying to do to the car?
I'll have pics of the end result on the car when I do it. Now that I've put some thought into doing it the easy way, it seems, well, easy.
Indy wrote:http://img.photobucket.com/albums/v87/F ... 00x561.jpg
About 15.8mm for 6°. There's still a small margin there because I'm assuming a centered bolt. If you really want to split hairs you could probably get 6 degrees with 14.9mm if you account for the bolt shifting off the centerline of the convex washer.
Thanks! Centering the bolt is a good assumption.
Re: The Mule rides again (sort of) - pics.
Posted: Thu Feb 03, 2011 10:40 am
by AkursedX
The Dark Side of Will wrote:
Go to
http://www.mcmaster.com and enter 98148A162 in the search box. That's the part we're talking about modifying.
That's obviously just one part necessary for the modification I want to make to the car... Do you understand what I'm trying to do to the car?
I'll have pics of the end result on the car when I do it. Now that I've put some thought into doing it the easy way, it seems, well, easy.
With Indy's picture, I have a better idea of what's going on now. I really needed a visual there. I really don't have any input though. I'm just an interested by-stander and will be looking forward to seeing where this will go.
Re: The Mule rides again (sort of) - pics.
Posted: Sun Feb 06, 2011 10:54 pm
by teamlseep13
So you are lifting the body up an inch and using washers that are convex to center the bolts in the subframe? Am I completely off?
Re: The Mule rides again (sort of) - pics.
Posted: Mon Feb 07, 2011 7:37 am
by The Dark Side of Will
teamlseep13 wrote:So you are lifting the body up an inch and using washers that are convex to center the bolts in the subframe? Am I completely off?
That's part of it. What I'm really doing is rotating the front suspension forward to reduce the factory pro-dive. I would like to be able to raise the rear pivot of the lower control arm, but I'd have to rework the coolant pipes to do that. Using spacers and lowering knuckles is easier than using spacers and lowering knuckles AND reworking the coolant pipes.
Re: The Mule rides again (sort of) - pics.
Posted: Sat Feb 12, 2011 10:06 pm
by The Dark Side of Will
The Dark Side of Will wrote:
I got the broken fenders and gooned up nose off The Mule over the weekend and installed Rodney Dickman's door detent rollers. As expected from Rodney, they are a high quality product with a drop-in fit. It is necessary to grind the peening off the bottom end of the original axle, but that's not too hard. Rodney's directions say to remove the hinge from the car and perform the operation on the bench. It can be done on the car by removing the fender and is actually quite easy. I used an electric die grinder, so the operation would take a good bit longer with a dremel. I'm not sure if a 4.5" angle grinder would fit...
Pics to follow when I get my Eeeeeeeeee PC back from the shop.
phpBB/viewtopic.php?f=3&t=17388


Re: The Mule rides again (sort of) - pics.
Posted: Mon Feb 14, 2011 9:22 pm
by teamlseep13
Ah I understand now.
I haven't really done any calculations on what % of pro/anti dive the Fiero has, any idea and how much you will change it after the sub frame rotate and lift?
I guess this would be the easiest way with the least modification, if you messed around with the upper control arm mounting points you would be flirting with disaster.
Worried about the added harshness during bump or are you not changing it drastically?
Re: The Mule rides again (sort of) - pics.
Posted: Mon Feb 14, 2011 10:04 pm
by The Dark Side of Will
teamlseep13 wrote:Ah I understand now.
I haven't really done any calculations on what % of pro/anti dive the Fiero has, any idea and how much you will change it after the sub frame rotate and lift?
I guess this would be the easiest way with the least modification, if you messed around with the upper control arm mounting points you would be flirting with disaster.
Worried about the added harshness during bump or are you not changing it drastically?
Haven't calculated how much it has or how much I'm changing it. I just think it'll be better when I'm done.
Not worried in the slightest about added harshness over bumps. I just think the Fiero feels horrible when you stand on the brakes going into a corner and the nose drops 8 inches from full throttle to max effort braking. People on the Fiero Racing List at Yahoo groups have mentioned being able to drag the chin spoiler with race rubber, upgraded brakes and stock springs. That's just unsat. A supercar should be composed under all conditions, and that's what I'm going for.
Re: The Mule rides again (sort of) - pics.
Posted: Thu Feb 17, 2011 1:29 am
by teamlseep13
I figured you wouldn't be worried!:)
Better I am sure it will be. The nose drop is quite annoying when you stand on the brakes and with any kind of upgrade to the braking system I am sure it is a chin dragger for sure!
Re: The Mule rides again (sort of) - pics.
Posted: Sun Feb 20, 2011 10:44 am
by The Dark Side of Will
More accurate measurements:
The center-to-center distance of the lower control arm lower pivots is ~8 3/4"
Spacing the crossmember 1" down at the center of the forward pivot would be 6.5 degrees of tilt.
Spacing it 1.5" down would be 9.7 degrees.
I can work out what the spacers should be for each of these combos easily enough, but I'll need to get the fenders on the car so that I can measure where the wheel sits within the wheel opening. I'd like to end up with it centered, but we'll see how that stacks up vs. the rear ride height and whether the body ends up with a rake or not.
Looks like the front wheel house openings are 29" front to back, while the rears are 30".
Re: The Mule rides again (sort of) - pics.
Posted: Sun Feb 20, 2011 2:42 pm
by The Dark Side of Will
I'm planning to use 1/4" steel reinforcements against the body and the crossmember, with a set of spherical washers and a spacer in between the two reinforcement strips. The nominal stack height of the spherical washers is 8mm.
If I set my desired drop to 1.092" at the lateral view centerline of the LCA forward pivot, then the combined stack height (0.813) of the two reinforcements and the spherical washer set is all the spacer I'll need at the rear-most of the crossmember mount bolts. In other words, I'll only have to make 6 spacers, rather than 8. I'll go for this first and see how well it works. If necessary, or if I need to change the position of the wheel in the wheel house, I could go higher.
So here's the spacer table:
Code: Select all
Location      1.092 drop   1.500 drop
Lower-rear    0            0.308
Upper-rear    0.031        0.350
Upper-front   0.480        0.962
Lower-front   0.558        1.068
Re: The Mule rides again (sort of) - pics.
Posted: Sat May 07, 2011 3:50 pm
by The Dark Side of Will
I am putting a new fascia on The Mule, but the fascia I grabbed has a couple of small tears in it. Is there a glue I can use to close these tears?
Re: The Mule rides again (sort of) - pics.
Posted: Sat May 07, 2011 5:29 pm
by Emc209i
Don't laugh, but I used expanding Gorilla glue on a square plastic piece on the inside of a urethane bumper. Whatever you use, fasten it together on the inside, cover the external surface with a 2k primer, then use lightweight filler on the front and sand smooth. Prime again, and you're ready for paint.
Re: The Mule rides again (sort of) - pics.
Posted: Sun May 08, 2011 4:04 pm
by The Dark Side of Will
BLING!!
Right wheel house with POR-15 installed.

Front end prior to prep for POR-15:

Front end prep:

When I did the final rinse to clean off the "metal ready" (deposits zinc phosphate on bare steel), some of the original paint flaked off, so I didn't paint it... will have to go back and knock off as much soft paint as I can.
The two new fenders... left one sanded, right one not yet prepped.


Found this crack in the right fender:

How do I go about fixing that "the right way"?
Also a crack at the rear edge of the same fender:

Fenders on the rack ready for paint:


Also have some tears in the target fascia:


Is there a good way to fix these, or do I need to look for another one?
Re: The Mule rides again (sort of) - pics.
Posted: Sun May 08, 2011 4:32 pm
by allWorkNoPlay
Orange springs?
You should be able to repair those cracks. I wouldn't go looking for a new bumper.