Yes, I know that this is an easy one that most could do with their eyes closed. But somebody somewhere hasn't done it so when I did one recently I took pictures to document it. Hopefully this will help somebody eventually.
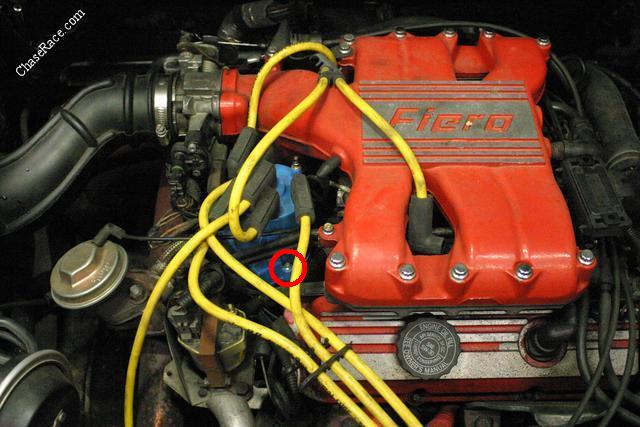
Step 1: Remove distributor cap. There are two screws, one is circled in red, one is on the other side of the cap. They take a phillips screwdriver or a 7/32" nut driver. If you remove the coil wire and one or two plug wires you'll be able to set the cap aside and leave the other wires connected.
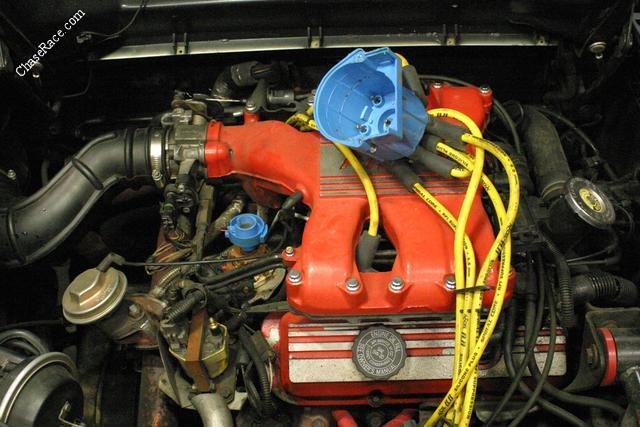
You should now have something that looks like this:
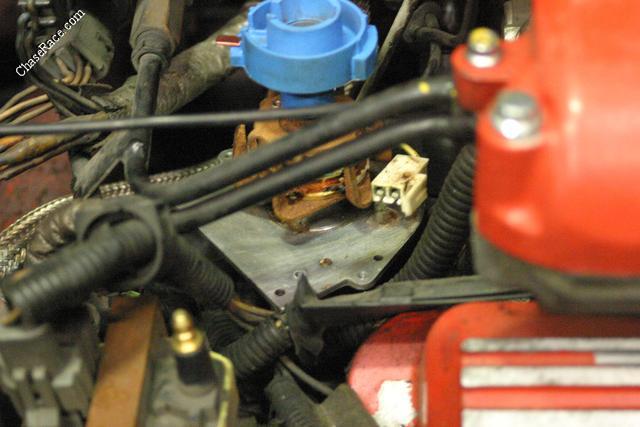
That black thing in there with the wires plugged into it is the ignition module. Remove the three wire connectors. One is inside the cap and is shown with the yellow arrow. The other two are outside the distributor cap and can't be seen in this photo. Remove the two screws (circled in red) that hold down the ignition module. They are 7/32" hex heads.
It should now look something like this:
Clean up all the dirt and goo in there and make it look like this:
Now spread the new goo (it should be included with the new module) on to the mounting surface of the module and re-assemble. Piece of cake.
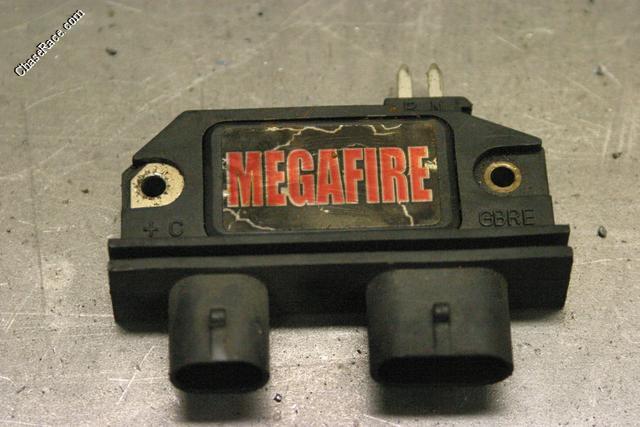
One final thing. Use a genuine GM module. Don't use a module that looks like this or you'll be doing the job over again soon.
How To: Replace ignition module on V6
Moderators: The Dark Side of Will, Series8217
-
- Posts: 562
- Joined: Mon Aug 15, 2005 11:46 pm
- Location: Duvall, WA
- Contact:
-
- Posts: 562
- Joined: Mon Aug 15, 2005 11:46 pm
- Location: Duvall, WA
- Contact:
Yep, I remembered that there was talk about this so that's why I took the pictures. When I did the fuel pump R&R I was too busy swearing at those @#$% rubber lines to take pictures, so no pictorial write up for that one.eHoward wrote:Can i use this post to start a tech article section?
Aaron, if it makes you feel any better, I recently had to change one on my Formula, too. (The pics in this thread are from a customer car, not mine).
-
- cant get enough of this site!
- Posts: 3289
- Joined: Wed Mar 30, 2005 2:37 pm
Two things that should be added. A picture to reference the pick up coil.
And the compound that should be used under the module for best results. Heat sink grease is cheap, more thermally conductive than dielectric grease, and has never failed me.
I had three aftermarket modules fail using the supplied dielectric grease, because it is designed as an insulator, rather than a thermal conductor. The heat sink grease has ceramic in it so that it does not conduct electricity, while allowing as much heat to disapate as possible.
I think its funny how you had to do the headlight motors in your Formula as well, and how my GT's headlight motor went out too...lol They are connected to each other now. You better not blow an engine or anything :thumbleft:Chase Race wrote: Aaron, if it makes you feel any better, I recently had to change one on my Formula, too. (The pics in this thread are from a customer car, not mine).
-
- Posts: 32
- Joined: Tue Nov 23, 2004 12:24 pm
- Contact:
-
- Posts: 160
- Joined: Thu Nov 18, 2004 4:44 pm
- Location: Pleasanton, CA
- Contact:
I use the same arctic silver that I use on cpu'sp8ntman442 wrote:
I had three aftermarket modules fail using the supplied dielectric grease, because it is designed as an insulator, rather than a thermal conductor. The heat sink grease has ceramic in it so that it does not conduct electricity, while allowing as much heat to disapate as possible.